Introduction 00:00
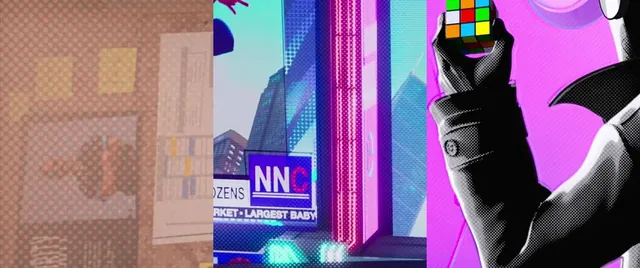
The halftone is a technique used in printing to create color variations looking like gradients using a grid of points of the same color but of varying size.
Seen from far away, a combination of various halftones results in pleasant shades of colors.
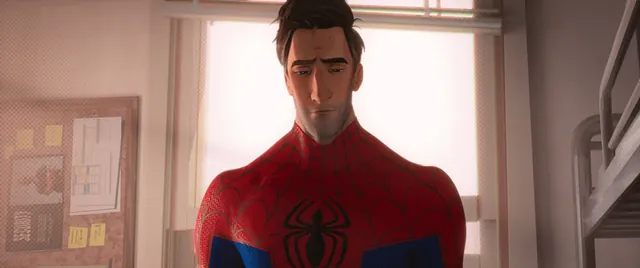
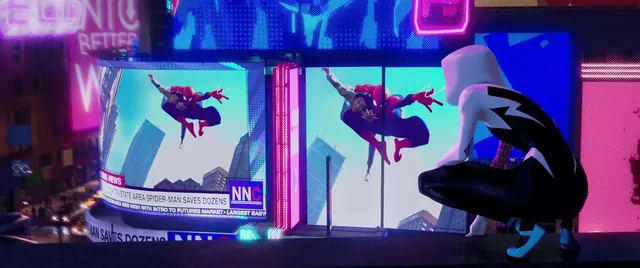
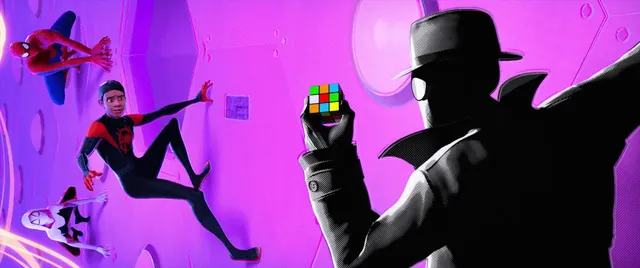
Today, it’s used to create old school vibes and you can appreciate it in modern movies such as Spider‑Man: Into the Spider‑Verse.
Make sure to watch the following images in a high enough resolution to appreciate the effect:
And here is a good example of halftone implementation by @YanSculpts: https://twitter.com/YanSculpts/status/1692251937087832389
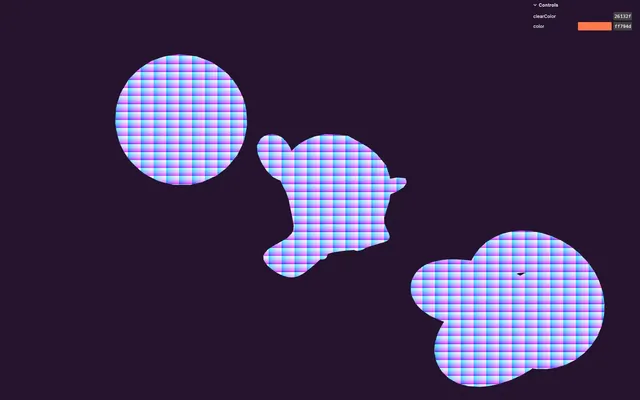
In this lesson, we are going to reproduce this effect to add shadow and reflection to our 3D objects:

Setup 02:57
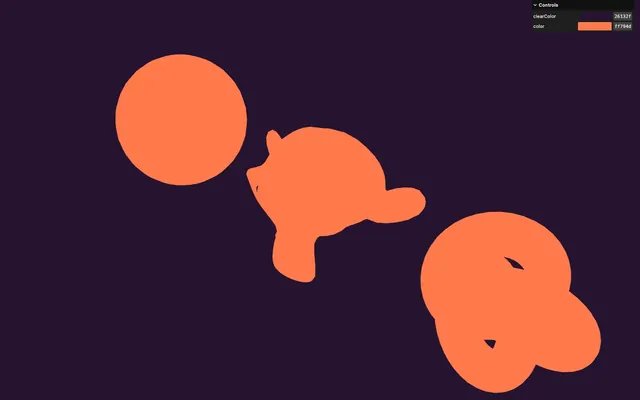
The starter already contains the following:
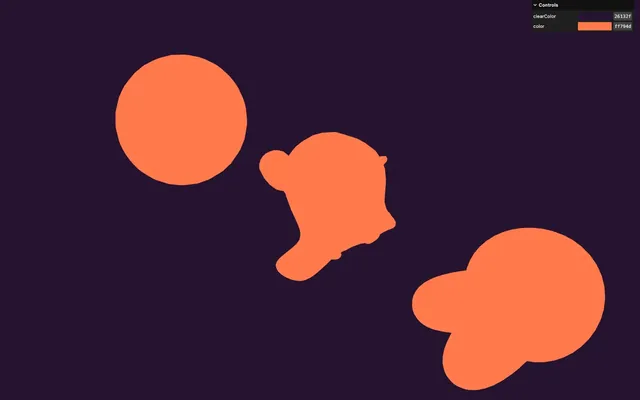
- 3 rotating objects: a sphere, Suzanne and a torus knot
- A basic shader already included in the
src/shaders/halftone/folder with avertex.glsland afragment.glsl - Light functions from the previous lessons in the
includes/folder (we won’t be using them just yet) - An instance of
lil-gui, with two tweaks, that controls theclearColorand theuColoruniform sent to the fragment shader. - The
vite-plugin-glsldependency to handle GLSL files OrbitControlsto rotate around
Lighting 04:14
Although the halftone idea is to create shading with uniform color, we are actually going to apply it like in Spider‑Man: Into the Spider‑Verse and add it on top of a subtle light shading.
- The
vNormaland thevPositionare already sent from the vertex to the fragment. - The
viewDirectionis already calculated. - The
normalis already normalized.
We are going to use the ambient light and the directional light.
Include both light sources in fragment.glsl:
#include ../includes/ambientLight.glsl
#include ../includes/directionalLight.glsl

void main()
{
    // ...
}
Create a light variable to vec3(0.0) and multiply it by the color:
void main()
{
    vec3 viewDirection = normalize(vPosition - cameraPosition);
    vec3 normal = normalize(vNormal);
    vec3 color = uColor;

    // Lights
    vec3 light = vec3(0.0);
    color *= light;

    // ...
}

Add the following ambientLight():
void main()
{
    // ...

    // Lights
    vec3 light = vec3(0.0);

    light += ambientLight(
        vec3(1.0), // Light color
        1.0        // Light intensity,
    );

    color *= light;

    // ...
}
We end up with the initial color because we are using a light intensity of 1.0.
Add the following directionalLight():
void main()
{
    // ...

    light += directionalLight(
        vec3(1.0, 1.0, 1.0), // Light color
        1.0,                 // Light intensity
        normal,              // Normal
        vec3(1.0, 1.0, 0.0), // Light position
        viewDirection,       // View direction
        1.0                  // Specular power
    );

    // ...
}
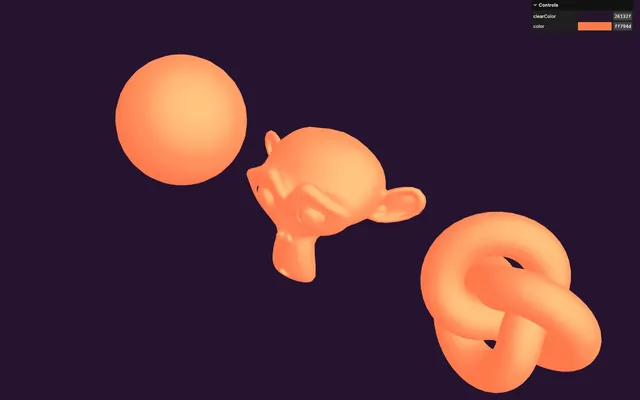
The directional light adds a subtle shading to our objects.
Grid 10:05
As mentioned earlier, halftone consists of a grid of points and that grid needs to stay static on screen and not follow the objects or the camera transformations.
For HTML/CSS developers: you can think of it as a fixed positioning.
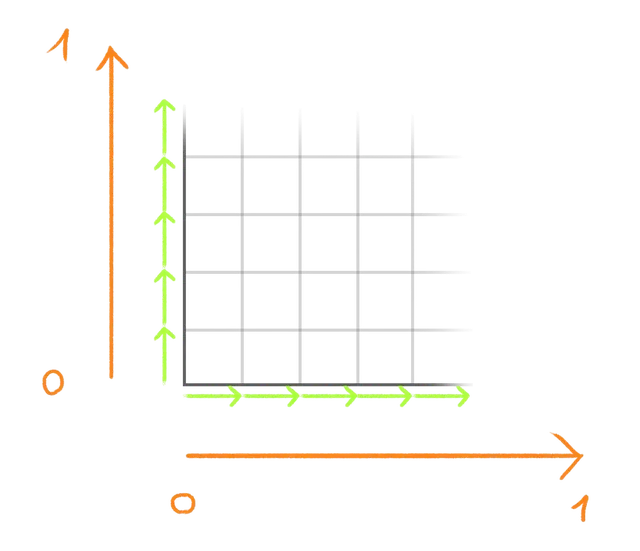
For now, all we want is some kind of UV coordinate but covering the whole render. Good news, there is a variable named gl_FragCoord doing just that.
gl_FragCoord is a vec4 where xy constitutes the “screen” coordinates and zw are used for the depth, but we don’t care about those last two.
Let’s see what’s in that gl_FragCoord.xy.
Right after the light part in our fragment shader, create a vec2 uv variable and swizzle xy from gl_FragCoord:
void main()
{
    // ...

    // Lights
    // ...

    // Halftone
    vec2 uv = gl_FragCoord.xy;

    // ...
}
Assign it to the first two values of gl_FragColor and set the rest to 1.0:
void main()
{
    // ...

    // Halftone
    vec2 uv = gl_FragCoord.xy;

    // Final color
    gl_FragColor = vec4(uv, 1.0, 1.0);
    // ...
}

Why is everything white? Have we made a mistake?
Divide gl_FragCoord.xy by 1000.0:
void main()
{
    // ...
    vec2 uv = gl_FragCoord.xy / 1000.0;
    // ...
}
Now we get some kind of gradient. According to your resolution and pixel ratio, you might get a different result and you might have to move the camera around in order to enjoy that gradient.
The reason is that gl_FragCoord.xy are fragment coordinates, meaning that the absolute bottom left fragment’s coordinates are 0.0, 0.0, the coordinates on its right’s are 1.0, 0.0, the next one 2.0, 0.0, and it goes on and on like that:
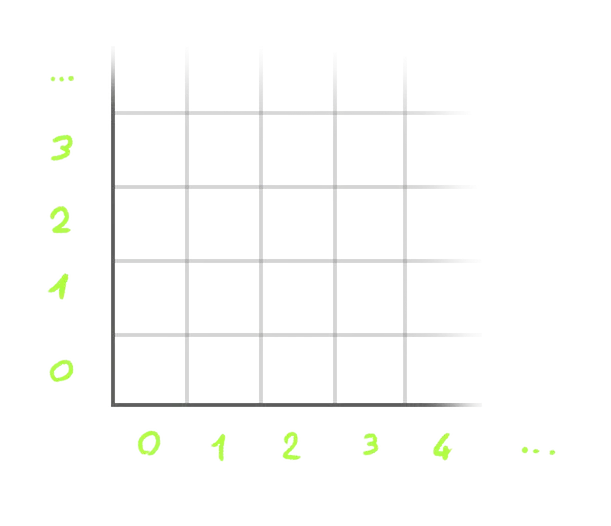
Meaning that if you are rendering with a 1920x1080 resolution, the gl_FragCoord.xy on the top right corner will have the values 1919.0 and 1079.0.
We want to have a normalized value, meaning that regardless of the render resolution and the pixel ratio, we want something that goes from 0, 0 (bottom left) to 1, 1 (top right).
To do so, we need to send the resolution to our shader.
In script.js, create a uResolution uniform using the Uniform class. Then, send it a Vector2 with the sizes.width and sizes.height, both multiplied by the sizes.pixelRatio:
const material = new THREE.ShaderMaterial({
    // ...
    uniforms:
    {
        // ...
        uResolution: new THREE.Uniform(new THREE.Vector2(sizes.width * sizes.pixelRatio, sizes.height * sizes.pixelRatio))
    }
})
Update the uniform in the resize callback:
window.addEventListener('resize', () =>
{
    // Update sizes
    // ...

    // Update materials
    material.uniforms.uResolution.value.set(sizes.width * sizes.pixelRatio, sizes.height * sizes.pixelRatio)

    // ...
})
In fragment.glsl, retrieve the uResolution as a vec2:
uniform vec2 uResolution;And now we can divide gl_FragCoord.xy by uResolution which should result in a uv going from 0 to 1 horizontally and vertically regardless of the resolution:
void main()
{
    // ...

    // Halftone
    vec2 uv = gl_FragCoord.xy / uResolution;

    // ...
}
We’ve actually made a small mistake. But since we can’t notice it for now, let’s move forward.
Our uv isn’t a grid right now. We want the value to go from 0 to 1 in a few pixels and then repeat again and again.
To do that, we are going to multiply uv (currently going from 0 to 1) by a high number and use a modulo to make the value go back to 0 as soon as it reaches 1.
Multiply by 50.0 and use the mod function with 1.0 as the limit:
void main()
{
    // ...
    vec2 uv = gl_FragCoord.xy / uResolution;
    uv *= 50.0;
    uv = mod(uv, 1.0);

    // ...
}
Now that looks more like a grid. Unfortunately, the cells are stretched according to the render aspect ratio.
And that was the mistake we made earlier. Fortunately, there is an easy fix for it. Instead of dividing by uResolution, we are going to divide by uResolution.y only:
void main()
{
    // ...
    vec2 uv = gl_FragCoord.xy / uResolution.y;
    // ...
}
This way, both the horizontal and vertical axes are being divided by the same value (uResolution.y ), preserving their squareness.
Even better, the number we chose to multiply the grid corresponds to the number of vertical cells.
Let’s put it in a repetitions variable:
void main()
{
    // ...

    // Halftone
    float repetitions = 50.0;

    vec2 uv = gl_FragCoord.xy / uResolution.y;
    uv *= repetitions;
    uv = mod(uv, 1.0);

    // ...
}
Having separated variables will come in handy later when we put our halftone formulas in a function.
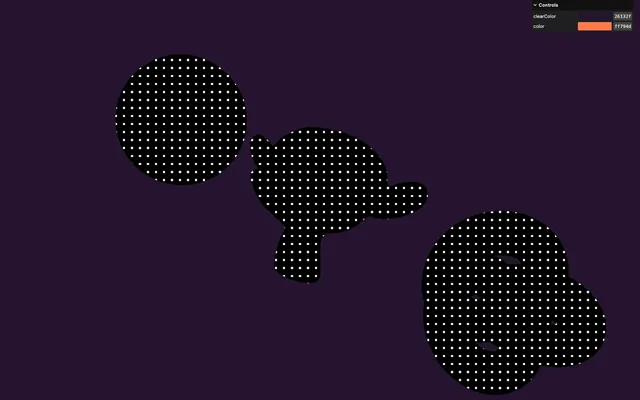
Points 26:15
Now that we have our grid UV, we can do what we did in the Shader Patterns lesson and draw a disc which will appear in each cell of the grid:
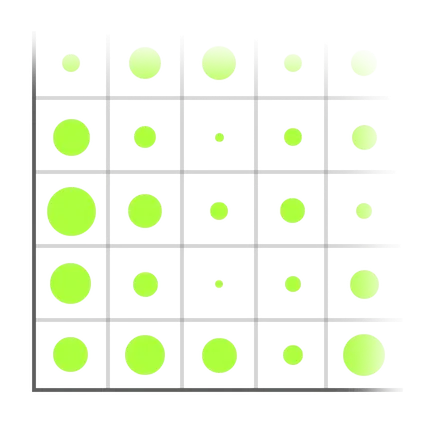
First, we need the distance from the center of the UV cell and we can achieve that with the distance function compared to vec2(0.5):
void main()
{
    // ...

    float point = distance(uv, vec2(0.5));

    // ...
}
Send it to gl_FragColor to have a look:
void main()
{
    // ...

    float point = distance(uv, vec2(0.5));

    // Final color
    gl_FragColor = vec4(point, point, point, 1.0);
    // ...
}
That’s a start, but we don’t want a radial gradient, we want a sharp disc. And to do that, we need the value to go from 0.0 to 1.0 immediately when the point value reaches a specific threshold.
We can use the step function with a threshold (first parameter) of 0.5:
void main()
{
    // ...

    float point = distance(uv, vec2(0.5));
    point = step(0.5, point);

    // ...
}
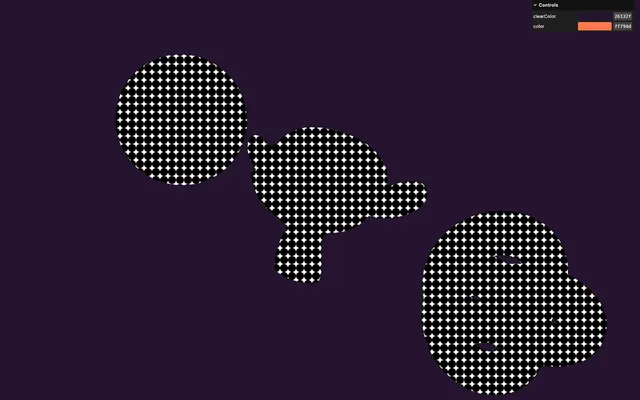
Not bad, but we want the opposite with point to 1.0 on the inside and to 0.0 on the outside.
One silly way to do it would be to invert the two parameters, but instead, we are going to start from 1.0 and subtract the step:
void main()
{
    // ...
    point = 1.0 - step(0.5, point);

    // ...
}
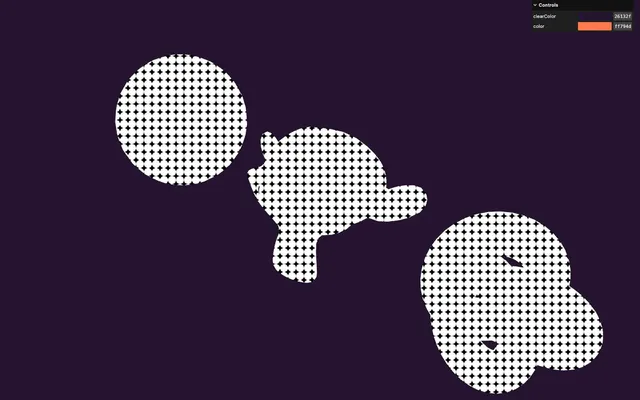
Radius and intensity 30:52
We have our grid of points. Now, we want to control their radius according to the intensity of the halftone effect.
Changing the radius is as simple as multiplying the 0.5 threshold we set when calling step. You can give it a quick test by multiplying it with, let’s say 0.3:
void main()
{
    // ...
    point = 1.0 - step(0.5 * 0.3, point);

    // ...
}
Let’s focus on calculating the intensity.
What we are going to do is very similar to what we did with the directional light.
We are going to decide on a direction for the halftone. If the faces are orientated toward that direction, we want a high value. If they are in the opposite direction, we want a low value.
We are going to use the usual dot product.
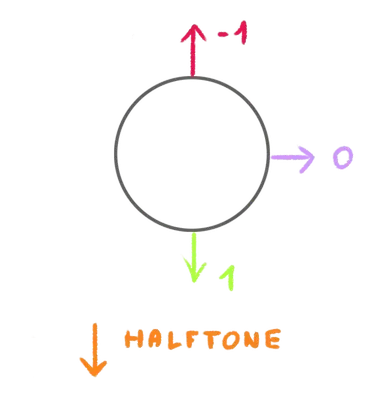
But first, let’s create a halftone direction. We are going to start with the shadow which is going to be under the objects, meaning that the direction is downward.
At the beginning of the halftone part, create a vec3 direction and set it downward (-1.0 on the y):
void main()
{
    // ...

    // Halftone
    float repetitions = 50.0;
    vec3 direction = vec3(0.0, -1.0, 0.0);

    // ...
}
Both repetitions and direction will become parameters at some point in the lesson, so let’s keep them together.
We already have the face orientation as normal. We can create a float intensity, to which we assign the dot‘s result of normal and direction:
void main()
{
    // ...

    // Halftone
    float repetitions = 50.0;
    vec3 direction = vec3(0.0, -1.0, 0.0);

    float intensity = dot(normal, direction);

    // ...
}
Send it to the gl_FragColor:
void main()
{
    // ...

    // Final color
    gl_FragColor = vec4(intensity, intensity, intensity, 1.0);
    // ...
}
The intensity is currently going from -1 to +1 and we want to control that value, clamp it and smooth it. You probably know where this is going. We are going to use the smoothstep.
Right after creating the direction, create a low variable to -0.8 and a high variable to 1.5:
void main()
{
    // ...

    // Halftone
    float repetitions = 50.0;
    vec3 direction = vec3(0.0, -1.0, 0.0);
    float low = - 0.8;
    float high = 1.5;

    // ...
}
Those will be used as parameters too.
Now call smoothstep on the intensity and use the low and high variables as the edges (first and second parameters):
void main()
{
    // ...

    float intensity = dot(normal, direction);
    intensity = smoothstep(low, high, intensity);

    // ...
}
The 0.0 of the gradient starts higher and that gradient never reaches 1.0 at the bottom
We can now multiply the intensity by the 0.5 instead of the temporary 0.3 and send point to gl_FragColor to see the result:
void main()
{
    // ...

    float point = distance(uv, vec2(0.5));
    point = 1.0 - step(0.5 * intensity, point);

    // Final color
    gl_FragColor = vec4(point, point, point, 1.0);
    // ...
}
Color 38:09
We are almost there. We now need to combine the halftone with the initial color.
First, create a vec3 pointColor variable at the beginning of the Halftone part and set it to red:
void main()
{
    // ...

    // Halftone
    float repetitions = 50.0;
    vec3 direction = vec3(0.0, -1.0, 0.0);
    float low = - 0.8;
    float high = 1.5;
    vec3 pointColor = vec3(1.0, 0.0, 0.0);

    // ...
}
Now mix the color with the pointColor according to the point variable and send the color to gl_FragColor as it was at the beginning:
void main()
{
    // ...

    color = mix(color, pointColor, point);

    // Final color
    gl_FragColor = vec4(color, 1.0);
    // ...
}

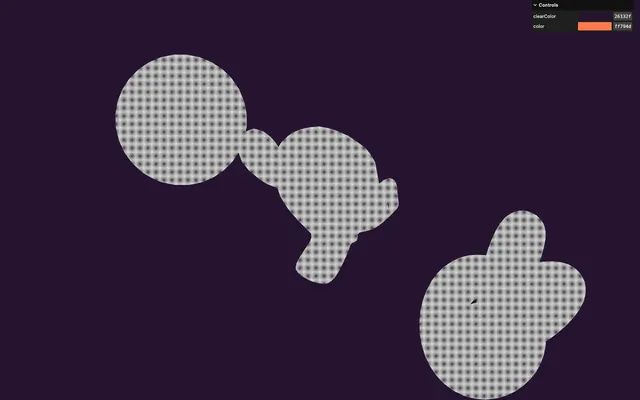
And voila! Although the points are too big and the color doesn’t really match, we have our halftone.
Function 40:39
Before tweaking it and in order to use it multiple times, we are going to add in a function.
And this is why we put all the setting variables at the beginning of the Halftone section.
Before the main(), create a halftone function returning a vec3 and set the following parameters:
vec3 halftone(
    vec3 color,
    float repetitions,
    vec3 direction,
    float low,
    float high,
    vec3 pointColor,
    vec3 normal
)
{

}
In addition to repetitions, direction, low, high, and pointColor, there is also color which is the base color we want to change and normal because we are going to need it in our function.
Put the code related to the halftone in it, but not the setting variables (saving now will trigger an error):
vec3 halftone(
    vec3 color,
    float repetitions,
    vec3 direction,
    float low,
    float high,
    vec3 pointColor,
    vec3 normal
)
{
    float intensity = dot(normal, direction);
    intensity = smoothstep(low, high, intensity);

    vec2 uv = gl_FragCoord.xy / uResolution.y;
    uv *= repetitions;
    uv = mod(uv, 1.0);

    float point = distance(uv, vec2(0.5));
    point = 1.0 - step(0.5 * intensity, point);

    color = mix(color, pointColor, point);
}
Return the output of the mix instead of updating the color:
vec3 halftone(
    vec3 color,
    float repetitions,
    vec3 direction,
    float low,
    float high,
    vec3 pointColor,
    vec3 normal
)
{
    // ...

    return mix(color, pointColor, point);
}
Our halftone function is ready.
Call it with the same parameters:
void main()
{
    // ...

    // Halftone
    color = halftone(
        color,                 // Input color
        50.0,                  // Repetitions
        vec3(0.0, - 1.0, 0.0), // Direction
        - 0.8,                 // Low
        1.5,                   // High
        vec3(1.0, 0.0, 0.0),   // Point color
        normal                 // Normal
    );

    // Final color
    // ...
}

You should see the exact same result, but we can now call the function to add new halftones.
Uniforms 44:16
Let’s have some fun and add the color and the repetitions of our shadow halftone to the debug panel.
In script.js, create a uShadowRepetitions uniform using the Uniform class and set it to 100:
const material = new THREE.ShaderMaterial({
    vertexShader: halftoneVertexShader,
    fragmentShader: halftoneFragmentShader,
    uniforms:
    {
        // ...
        uShadowRepetitions: new THREE.Uniform(100)
    }
})
On materialParameters, create a shadowColor property set to '#8e19b8'
const materialParameters = {}
materialParameters.color = '#ff794d'
materialParameters.shadowColor = '#8e19b8'
Create a uShadowColor uniform using the Uniform class and the Color class with the materialParameters.shadowColor:
const material = new THREE.ShaderMaterial({
    // ...
    uniforms:
    {
        // ...
        uShadowColor: new THREE.Uniform(new THREE.Color(materialParameters.shadowColor))
    }
})
Add a tweak for the uShadowRepetitions uniform:
gui
    .add(material.uniforms.uShadowRepetitions, 'value')
    .min(1)
    .max(300)
    .step(1)
Add a tweak for the shadowColor property and update the uColor uniform when it changes:
gui
    .addColor(materialParameters, 'shadowColor')
    .onChange(() =>
    {
        material.uniforms.uShadowColor.value.set(materialParameters.shadowColor)
    })
Retrieve both uniforms in the fragment shader:
uniform float uShadowRepetitions;
uniform vec3 uShadowColor;
Use them on the halftone call:
void main()
{
    // ...

    // Halftone
    color = halftone(
        color,                 // Input color
        uShadowRepetitions,    // Repetitions
        vec3(0.0, - 1.0, 0.0), // Direction
        - 0.8,                 // Low
        1.5,                   // High
        uShadowColor,          // Point color
        normal                 // Normal
    );

    // ...
}
Have fun.
Light halftone 01:16:52
Let’s make good use of our halftone function and create another one corresponding to a light coming from the top with associated uniforms.
You can try to do it yourself.
Add a lightColor property to materialParameters and set its value to '#e5ffe0':
const materialParameters = {}
materialParameters.color = '#ff794d'
materialParameters.shadowColor = '#8e19b8'
materialParameters.lightColor = '#e5ffe0'
Create the uLightRepetitions uniform to 130 and the uLightColor uniform to materialParameters.lightColor:
// ...
const material = new THREE.ShaderMaterial({
    // ...
    uniforms:
    {
        // ...
        uLightRepetitions: new THREE.Uniform(130),
        uLightColor: new THREE.Uniform(new THREE.Color(materialParameters.lightColor))
    }
})
Add corresponding tweaks:
gui
    .add(material.uniforms.uLightRepetitions, 'value')
    .min(1)
    .max(300)
    .step(1)

gui
    .addColor(materialParameters, 'lightColor')
    .onChange(() =>
    {
        material.uniforms.uLightColor.value.set(materialParameters.lightColor)
    })
Retrieve them in the fragment shader:
uniform float uLightRepetitions;
uniform vec3 uLightColor;
Call halftone again with the following parameters:
void main()
{
    // ...

    color = halftone(
        color,               // Input color
        uLightRepetitions,   // Repetitions
        vec3(1.0, 1.0, 0.0), // Direction
        0.5,                 // Low
        1.5,                 // High
        uLightColor,         // Point color
        normal               // Normal
    );

    // ...
}
And we are done!
Going further 01:16:52
As always, feel free to go further.
Here are suggestions:
- Add more tweaks, like for the halftone
direction,low, andend(don’t forget that thedirectionlength must be1). - Refactor the
halftonefunction. It can be written in a much shorter way. - Add a gradient to the halftone instead of the uniform color.
- Add an alpha parameter to the halftone in order to fade it in the color.
- Try to draw different shapes than a disc.